Getting Started
To help you get started with Jupyter AI, we’ll walk through:
Installing Jupyter AI
Installing agents
Creating a chat in JupyterLab
Collaborating with agents in JupyterLab
Install Jupyter AI
Install Jupyter AI in your Python environment using pip or your favorite
environment manager. Jupyter AI is distributed on PyPI and Conda Forge.
pip install jupyter-ai
uv pip install jupyter-ai
conda install -c conda-forge jupyter-ai
mamba install -c conda-forge jupyter-ai
micromamba install -c conda-forge jupyter-ai
pixi add jupyter-ai
Install agents
To allow users to freely choose which agents they want inside of JupyterLab, Jupyter AI does not ship with any agent by default. You will need to install at least one agent to get started:
To install agents, follow the official documentation for the agents you wish to use:
Some agents also require an additional ACP adapter or package to become available in Jupyter AI. If your agent is listed below, you will also need to install the corresponding package:
npm install -g @agentclientprotocol/claude-agent-acp
npm install -g @zed-industries/codex-acp
uv tool install mistral-vibe
# or
pip install mistral-vibe
Tip
If you use a Conda environment manager, we recommend installing the ACP agent adapter inside your environment. Use the package manager required by the adapter:
conda activate <env-name>
conda install nodejs  # for npm-based adapters such as Claude Code or Codex
npm install -g <npm-package-name>

# or, for Python-based adapters such as Mistral Vibe
pip install <python-package-name>
mamba activate <env-name>
mamba install nodejs  # for npm-based adapters such as Claude Code or Codex
npm install -g <npm-package-name>

# or, for Python-based adapters such as Mistral Vibe
pip install <python-package-name>
micromamba activate <env-name>
micromamba install nodejs  # for npm-based adapters such as Claude Code or Codex
npm install -g <npm-package-name>

# or, for Python-based adapters available on Conda Forge
micromamba install -c conda-forge <conda-package-name>
pixi shell
pixi add nodejs  # for npm-based adapters such as Claude Code or Codex
npm install -g <npm-package-name>

# or, for Python-based adapters available on Conda Forge, such as Mistral Vibe
pixi add <conda-package-name>
Create a chat
Jupyter AI will automatically detect which agents are available from the environment. You can now use Jupyter AI just by starting JupyterLab:
jupyter lab
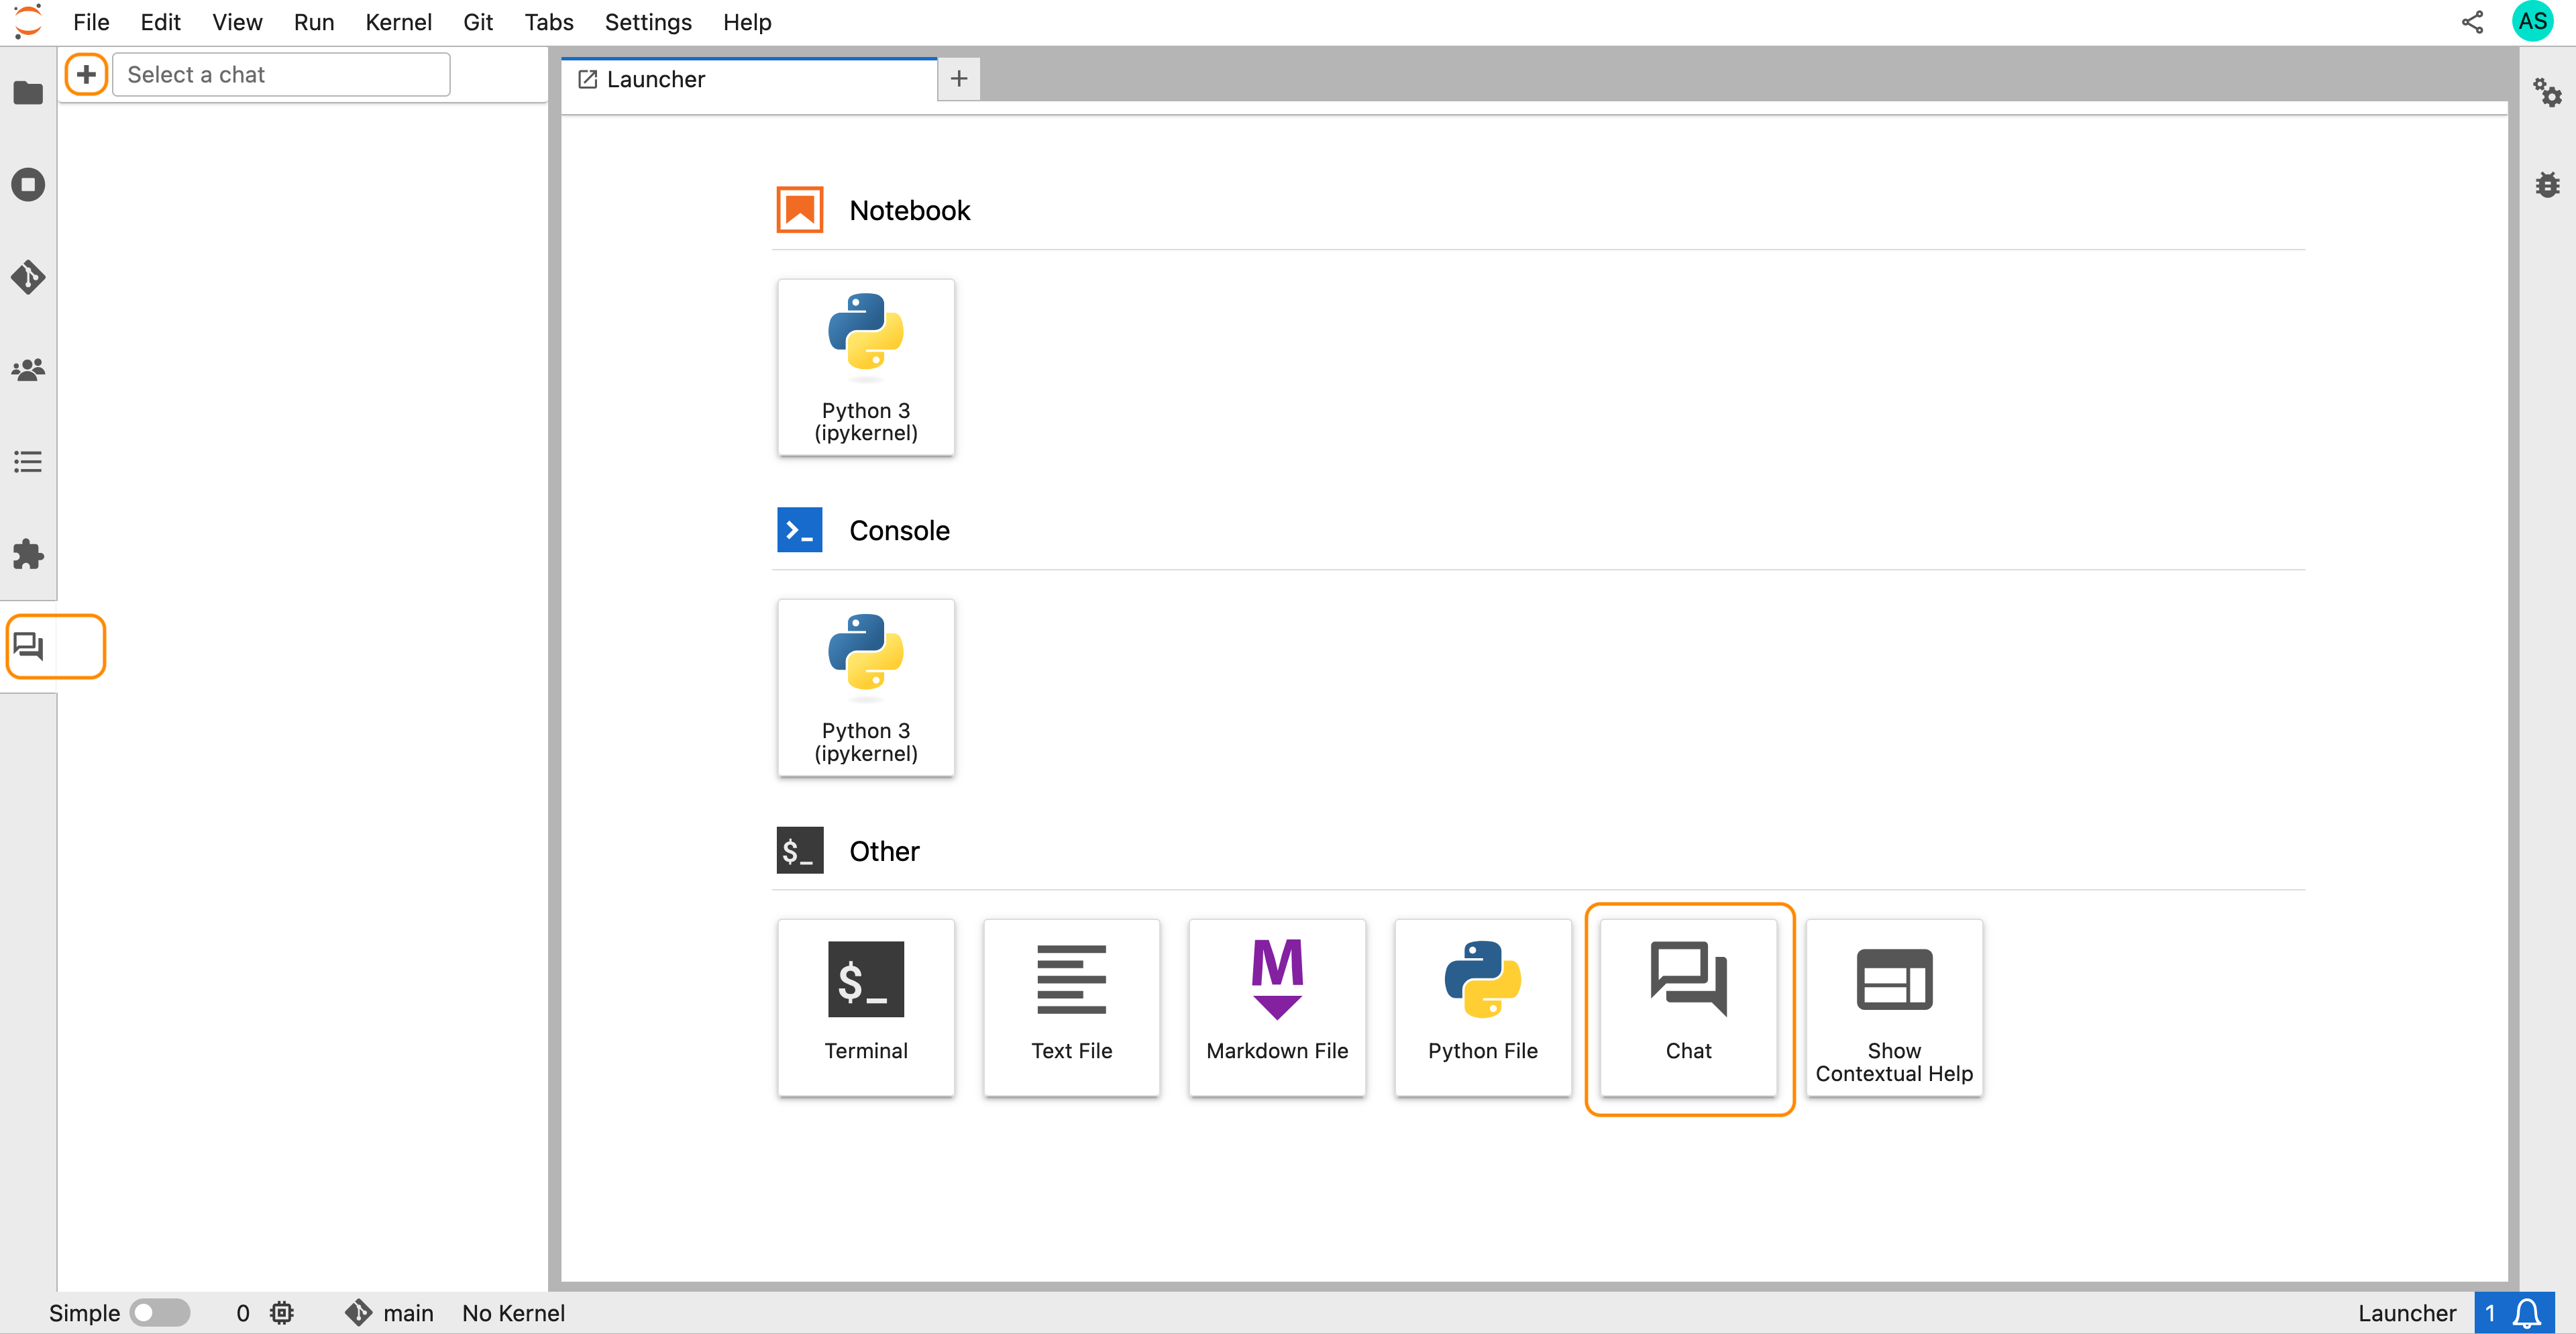
Next, create a chat by clicking the Chat card in the launcher page, or the + button in the chat sidebar panel:
Tip
In Jupyter AI, chats are simply files that live in your workspace. You can resume a chat by re-opening it as you would for any other document. You can also create and use multiple chats simultaneously to manage different threads of work.
Collaborate with an agent
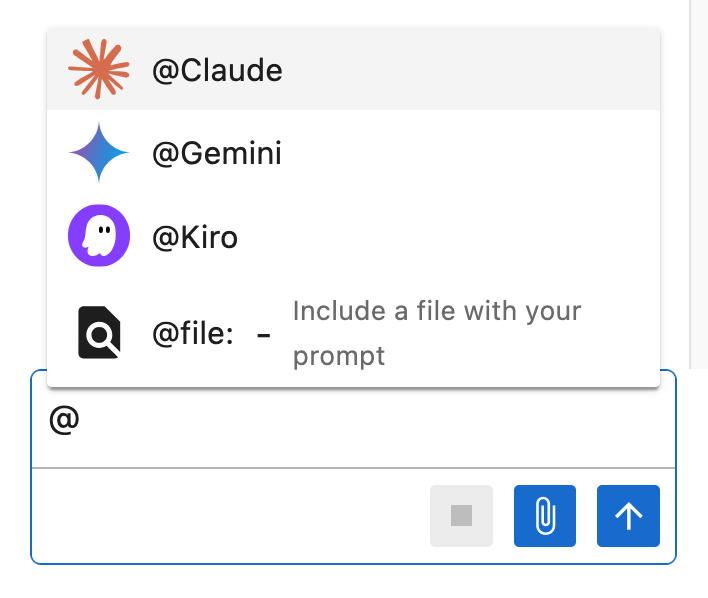
You should now see a chat open in JupyterLab. In Jupyter AI, each agent appears
as an AI persona in each chat. Typing the @ symbol will raise a menu
showing you all of the available agents you can @-mention (as well as other
humans connected to your server):
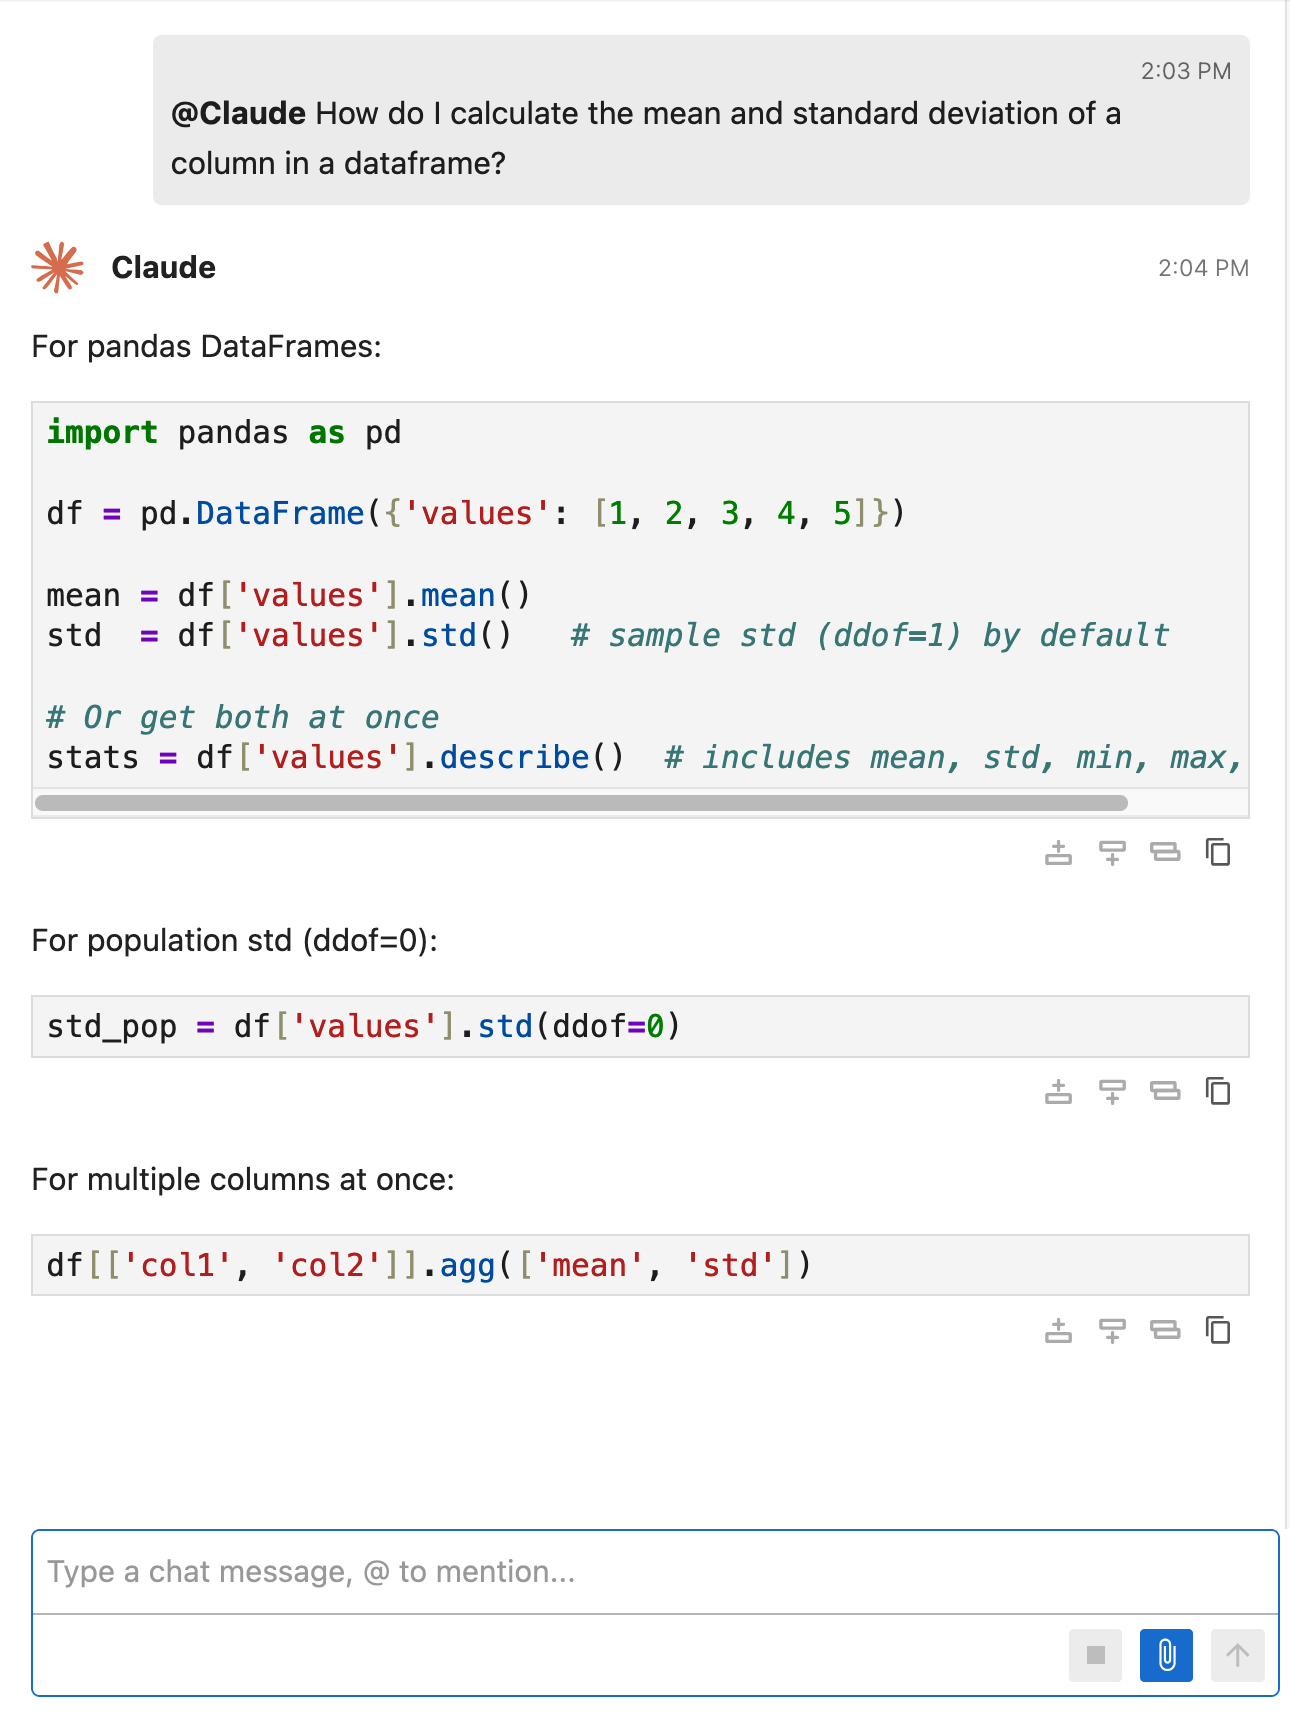
AI personas reply when @-mentioned, exactly like how you expect a human user
to do in other chat applications. For example, to ask Claude a question, type
@Claude How do I ...? into the input and send the message.
Tip
If you’re not logged in with an agent already, the agent will not respond to your request and instead prompt you to login. You may need to login via the command line. The agent will open the terminal for you automatically when possible.
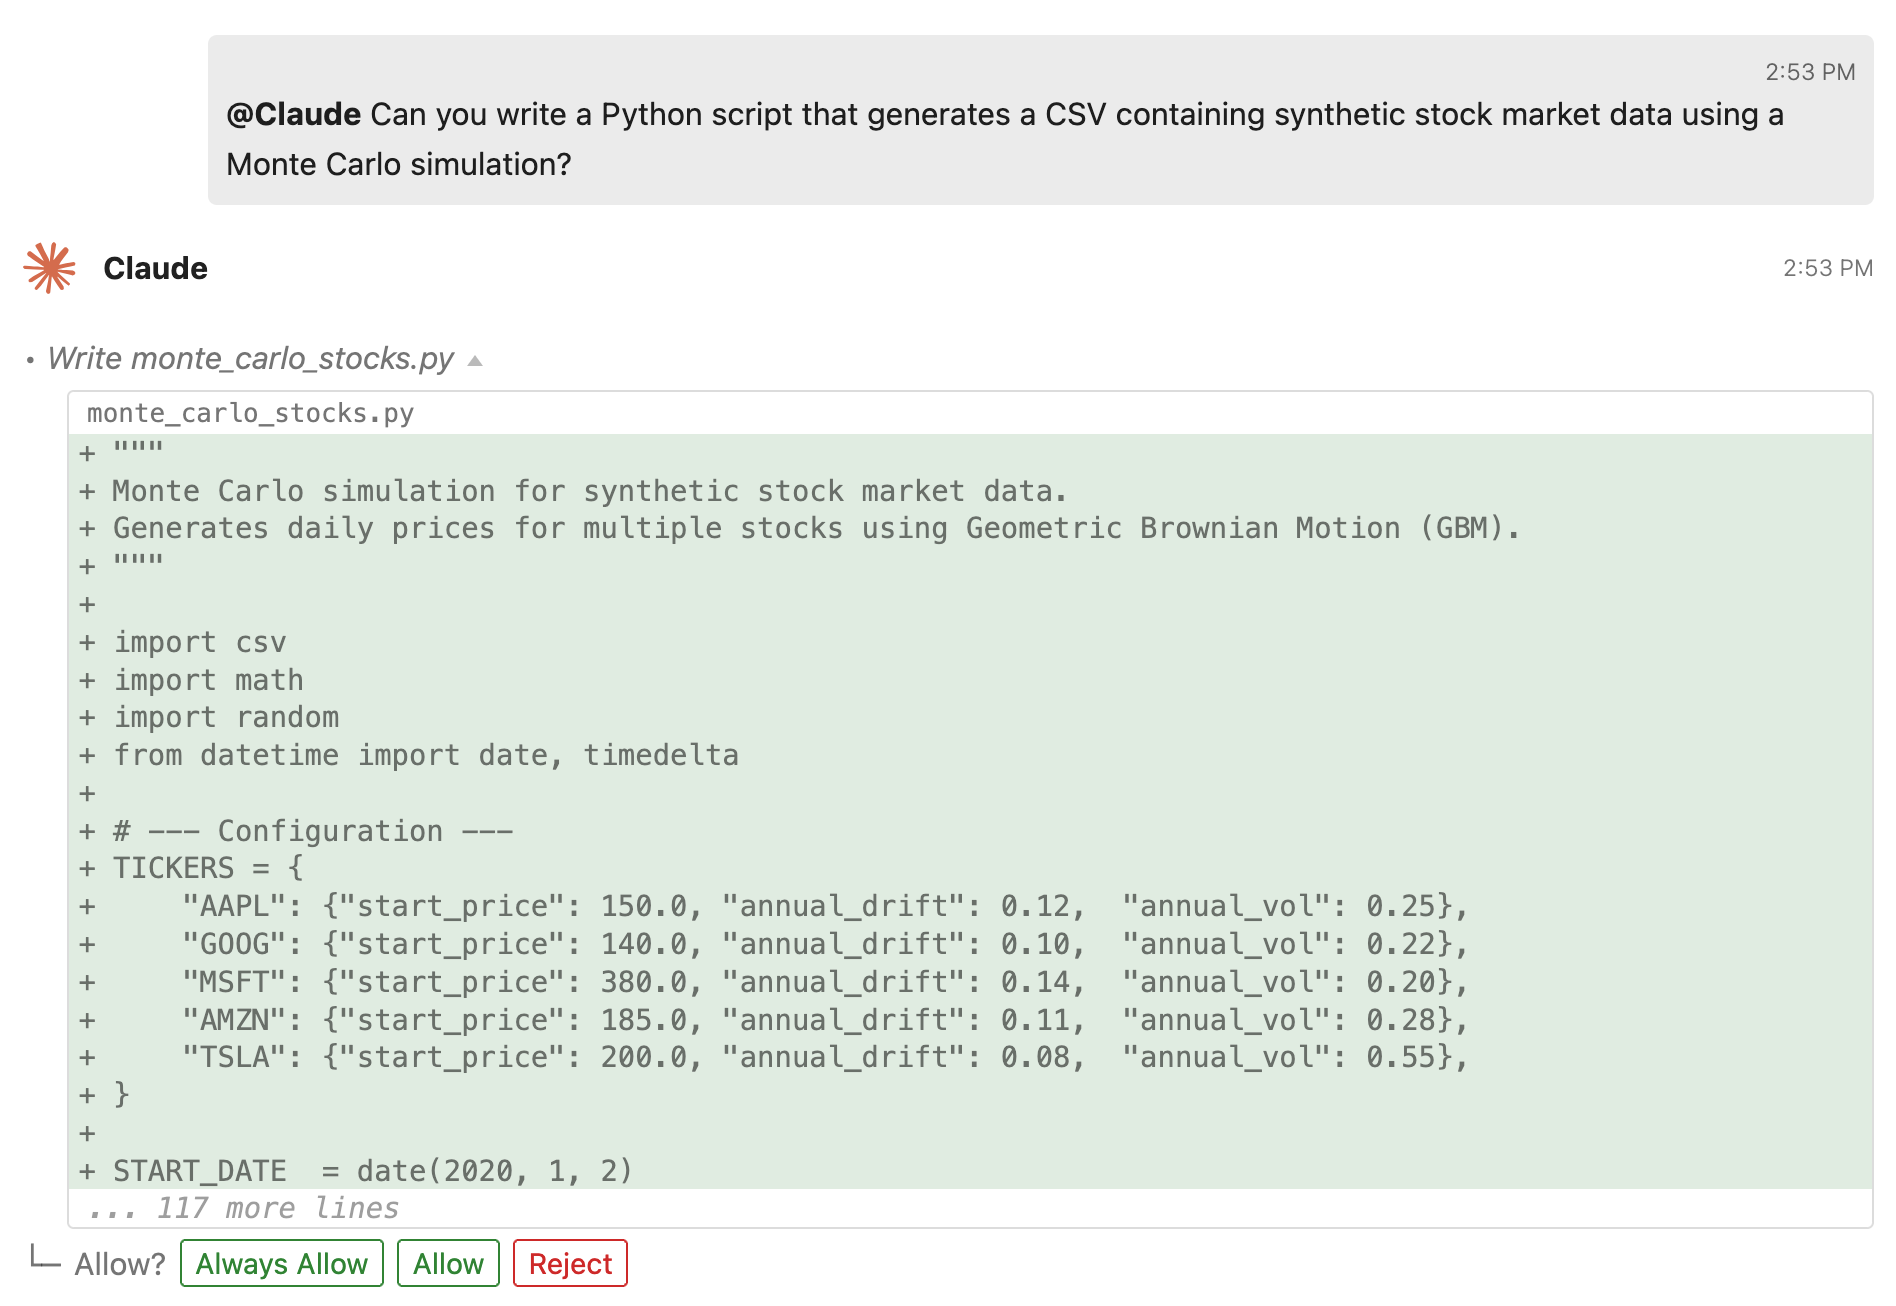
Agents can read files, write files, run shell commands, and interact with notebooks through the Jupyter MCP Server. Agents will request permission before doing anything besides reading files under the current workspace.
Next Steps
See the full User Guide for detailed documentation on all features.
See the Contributor Guide if you want to help build Jupyter AI.
See the Developer Guide if you want to extend Jupyter AI with custom agents or MCP servers.